Turn a Word document into a fillable form
You already have the document: an NDA, an intake sheet, or an agreement,
saved in Word with blanks like [CLIENT NAME] and [DATE] for the details
that change. This guide turns that document into an online form anyone
can fill out from a link, with no PDF editing and no new form builder to
learn. Formaliq builds the questions for you from the blanks in your
document.
The example is a mutual NDA used by a fictional firm, Harbor & Lane Law.
What you'll build
A fillable online form, built from the blanks in your Word document, that you can share with anyone as a link:
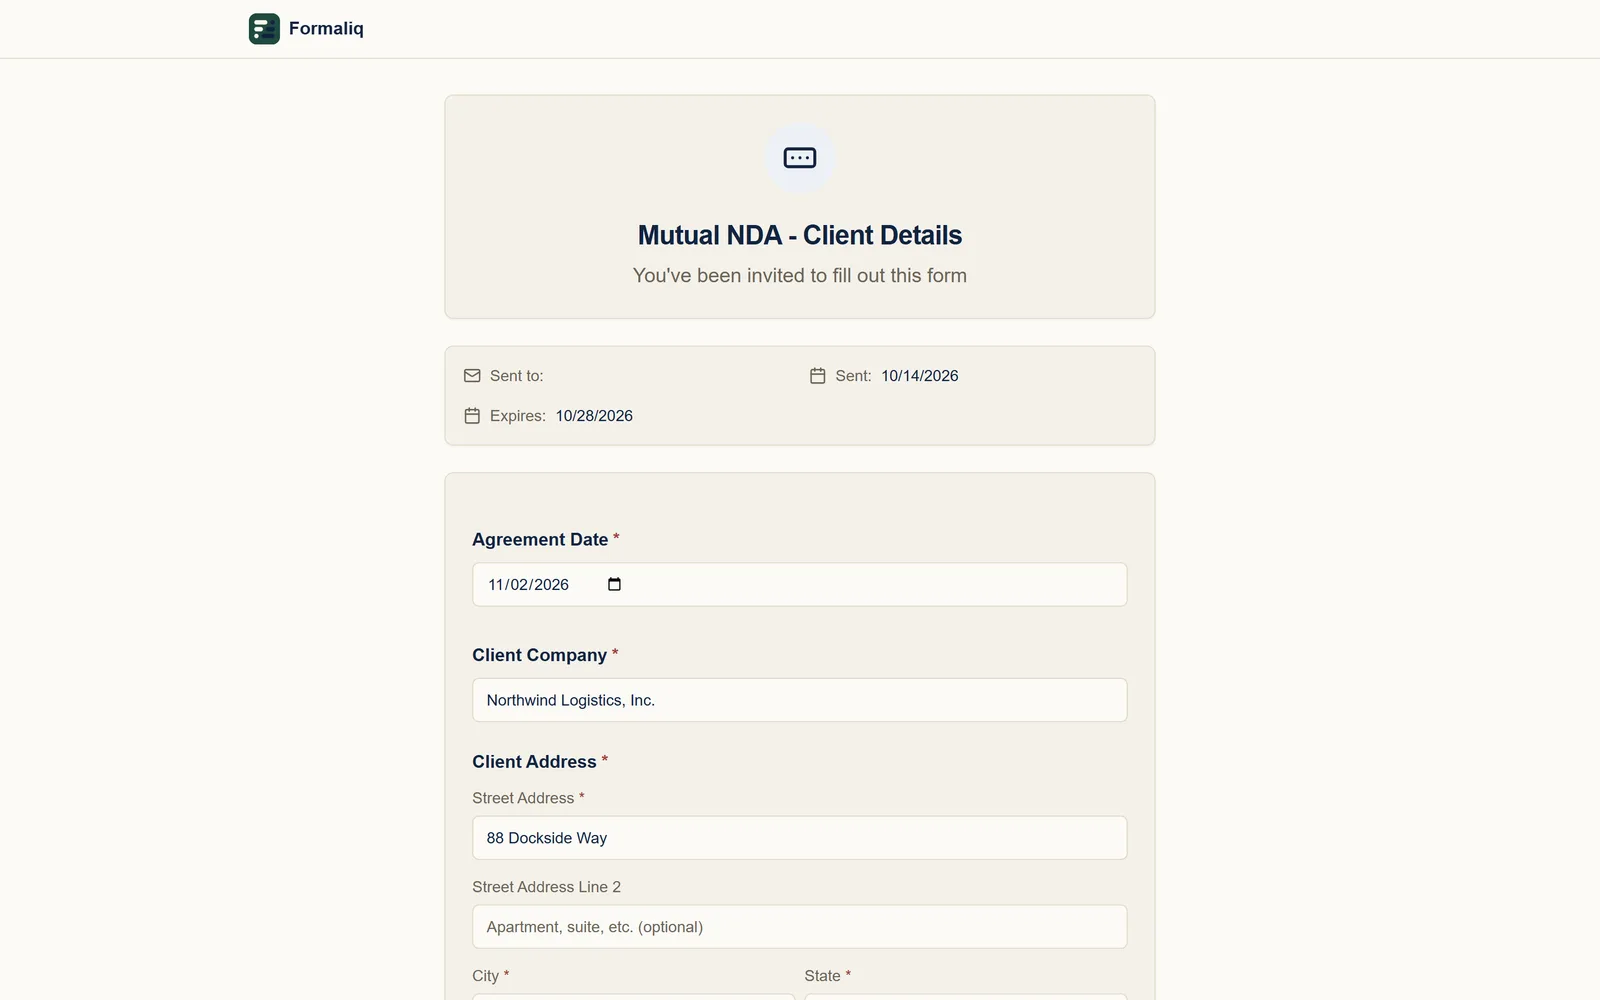
Because the form comes from the document, each response can also fill in the document itself. See Next steps.
Time needed: about 10 minutes.
Before you start
- A Formaliq account. The free 14-day trial is enough for this guide.
- Your document saved as a Word file (
.docx). - A workspace to keep it in. Any workspace works; this guide uses one named Northwind Logistics.
Step 1: Create a new template
Open your workspace and click New Template. Name it after the document, add a short description, and click Create Template.
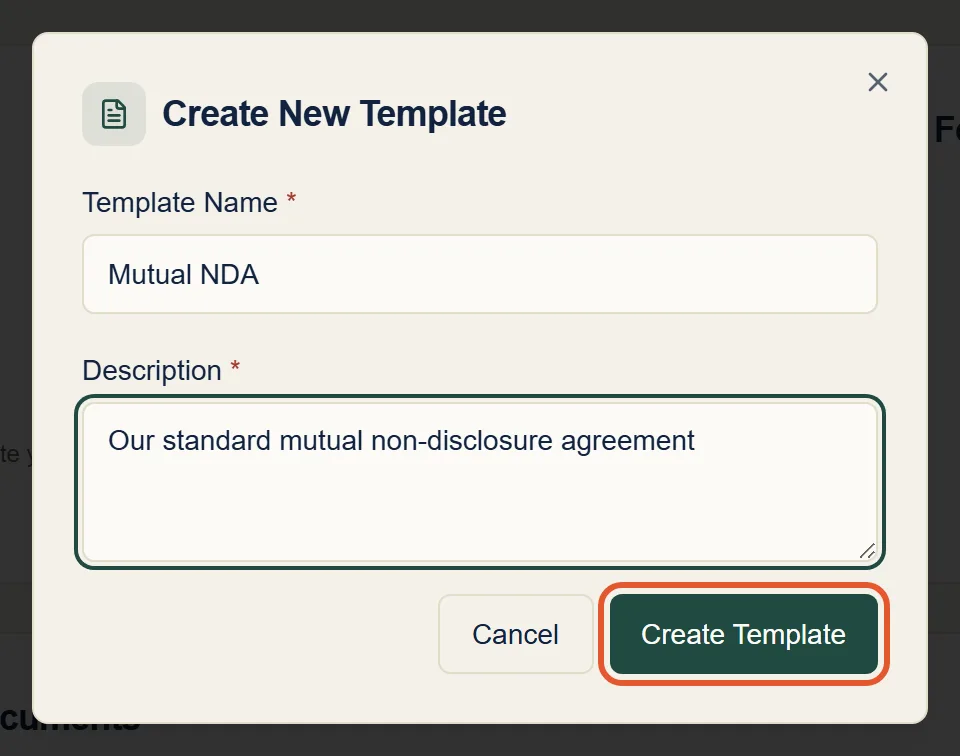
The template editor opens. It works much like Microsoft Word.
Step 2: Open your Word document
In the editor, click File → Open and choose your .docx file.
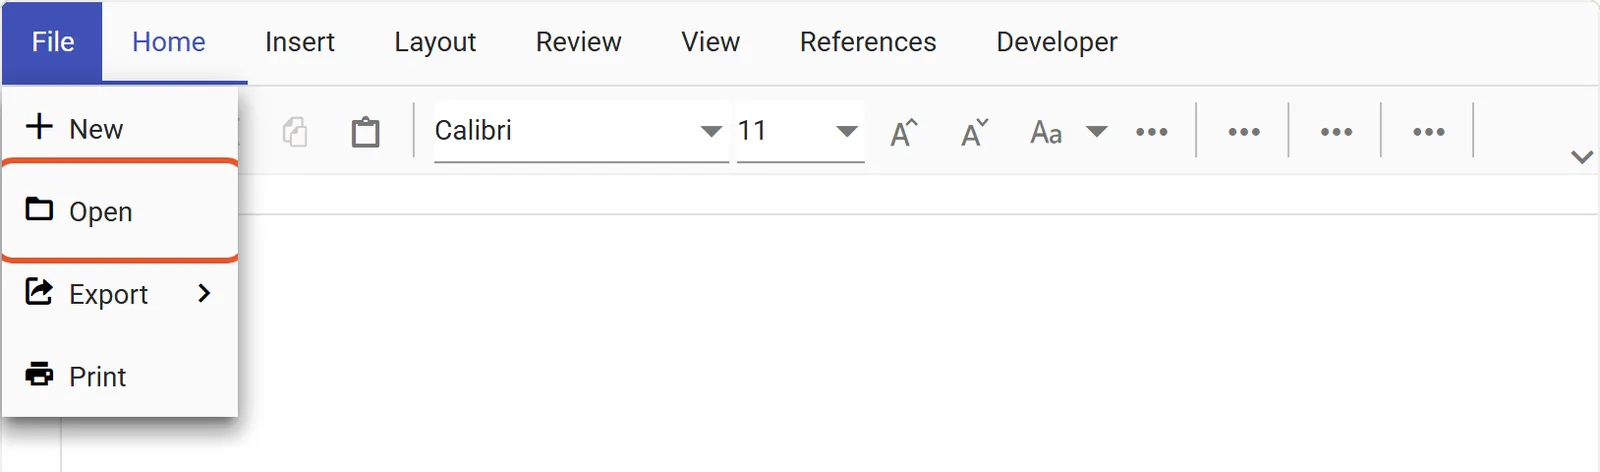
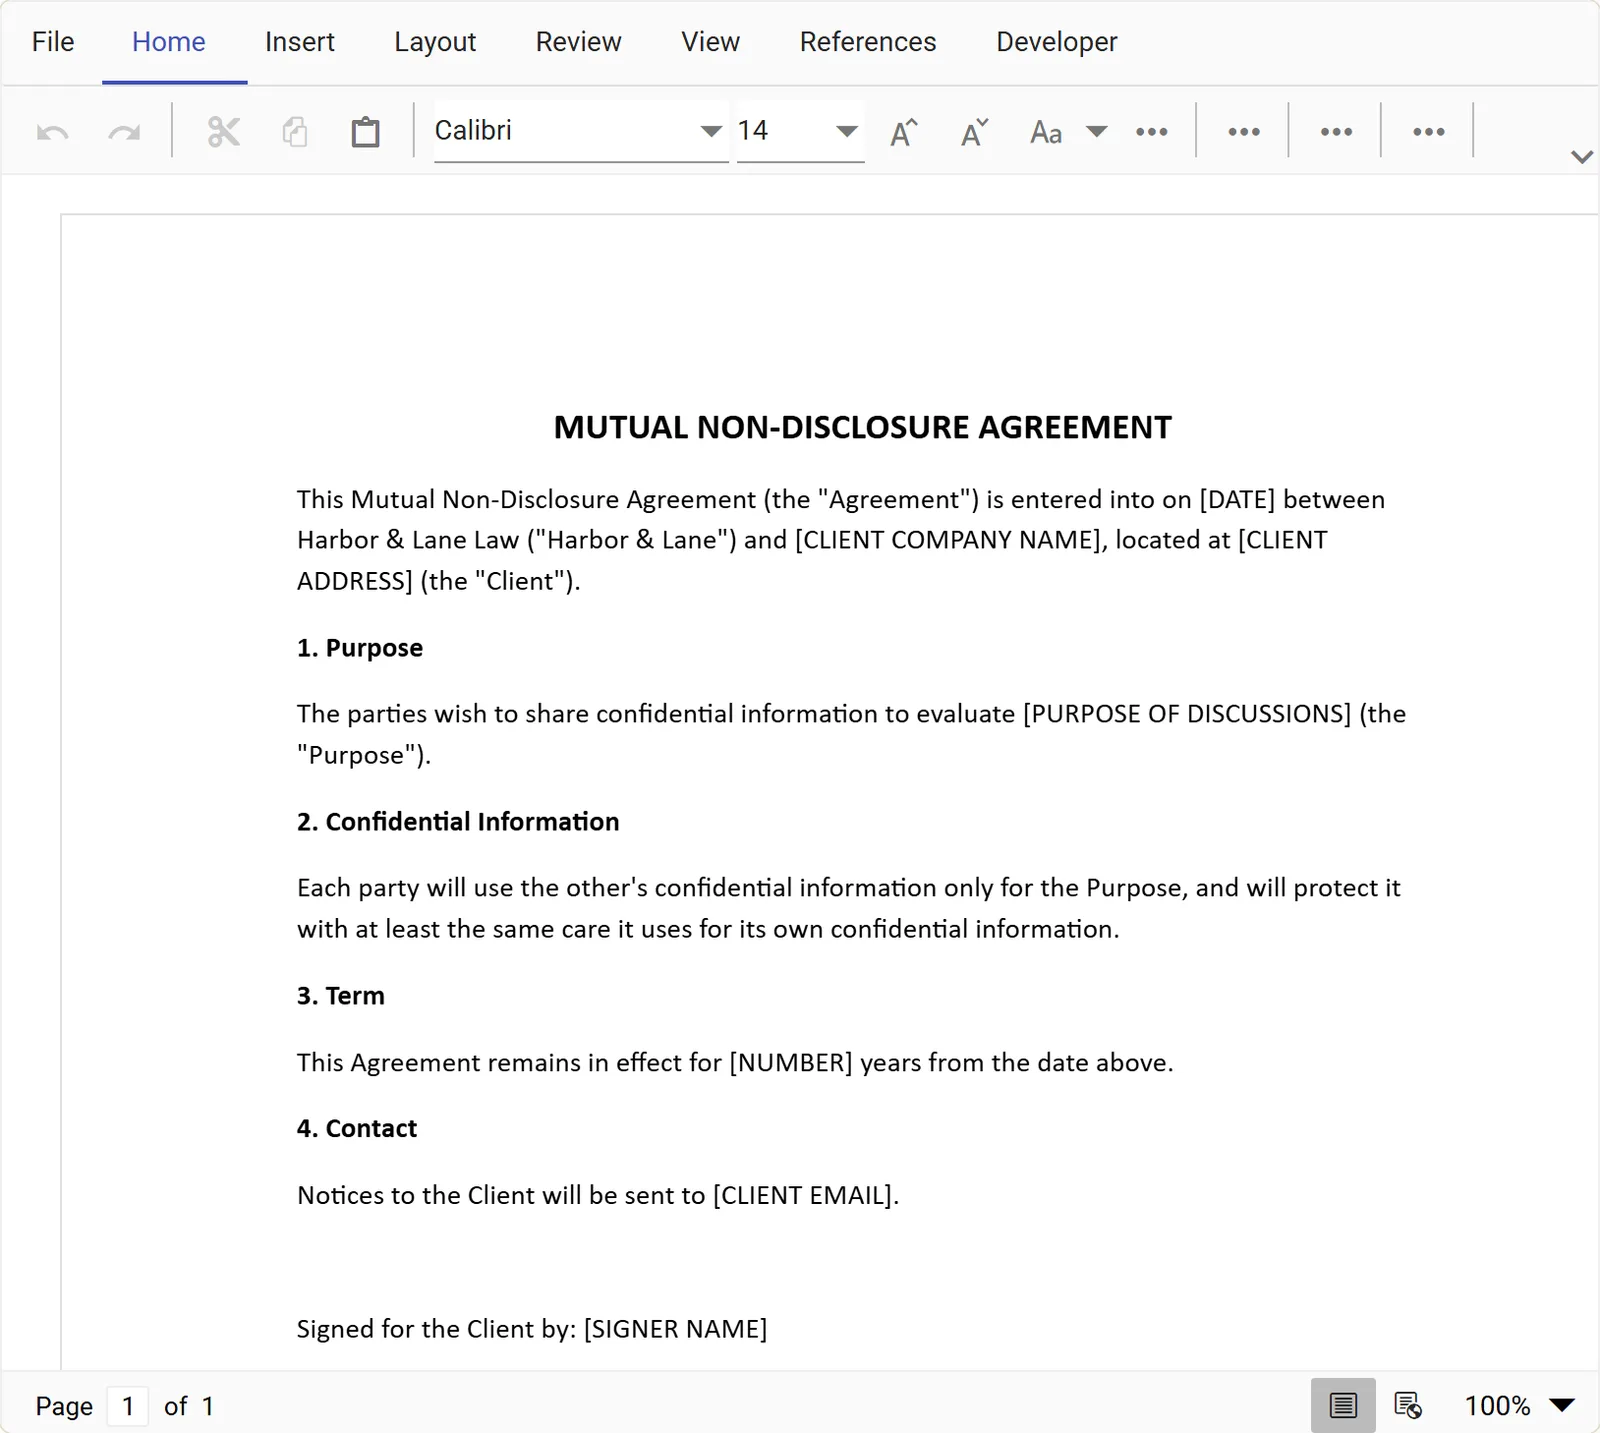
Your document opens in the editor with its text, headings, and formatting as they were in Word, blanks and all:
Step 3: Replace each blank with a placeholder
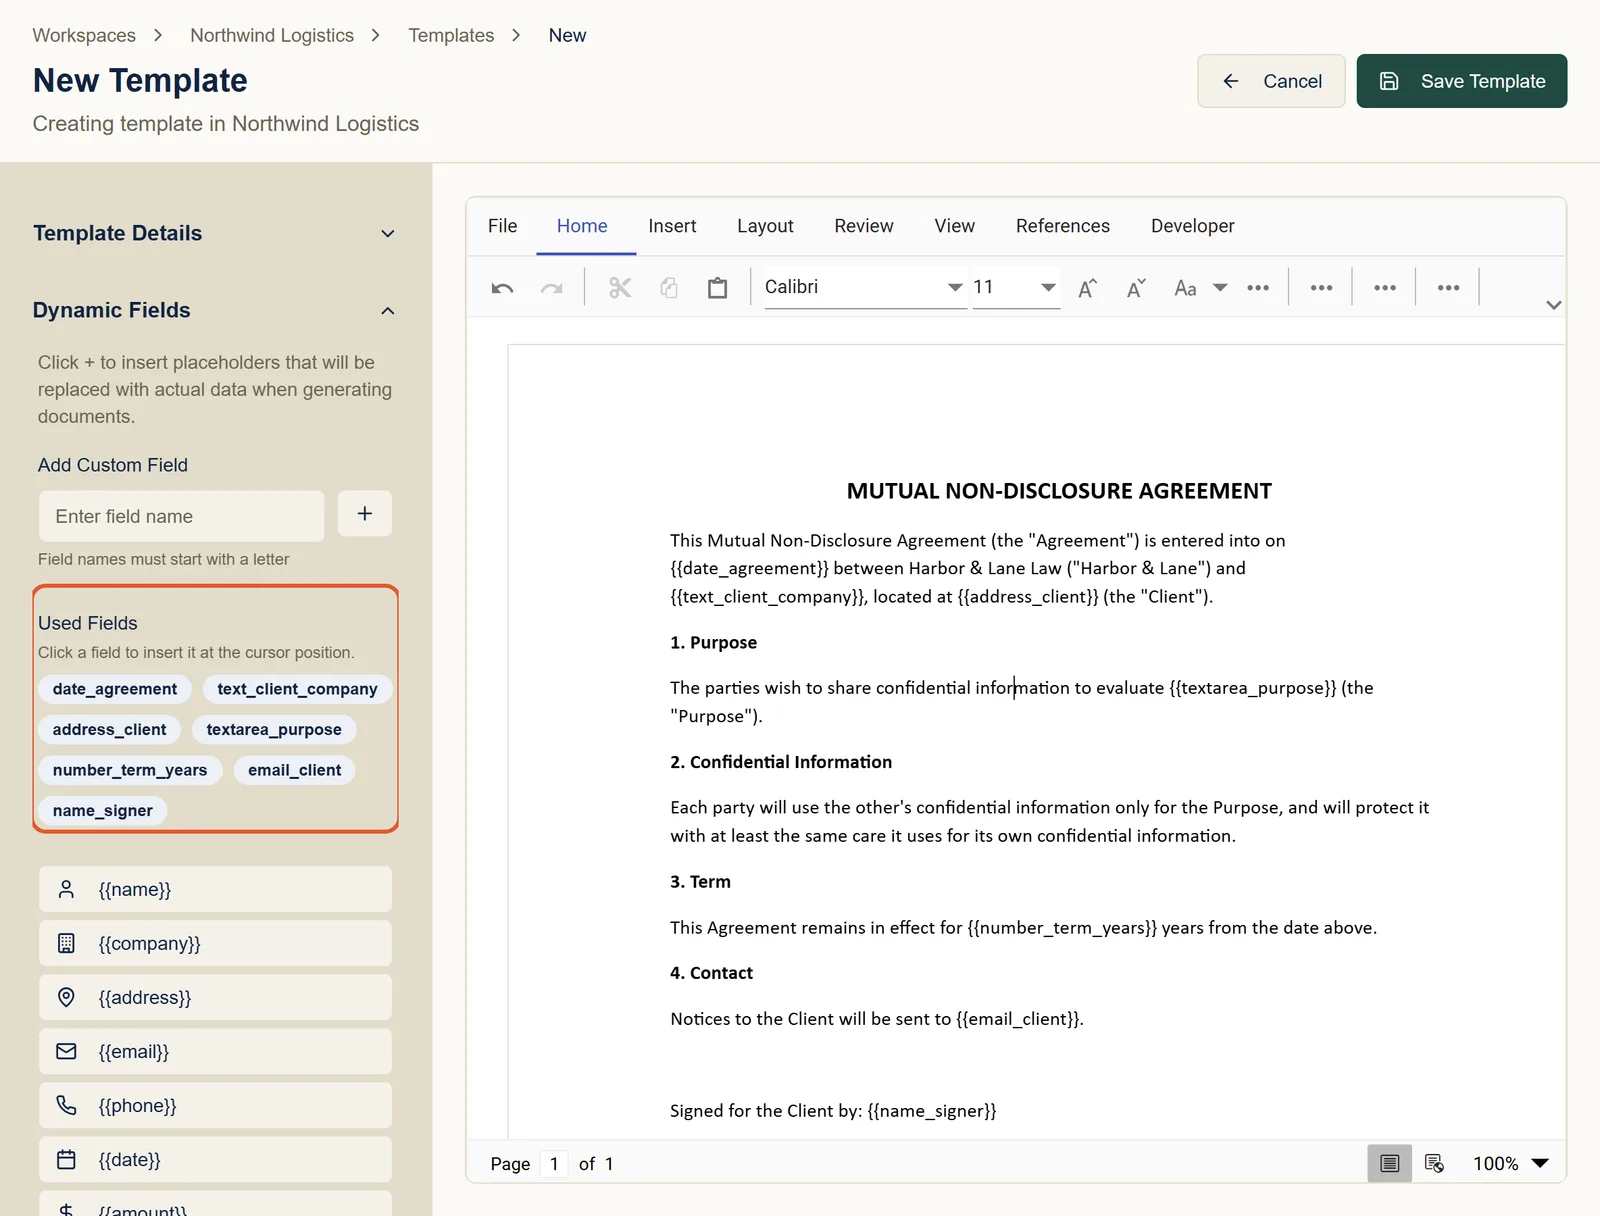
Now replace each blank with a placeholder: a short name in double curly braces that tells Formaliq what to ask. For the NDA:
| Blank in the Word document | Placeholder |
|---|---|
[DATE] | {{date_agreement}} |
[CLIENT COMPANY NAME] | {{text_client_company}} |
[CLIENT ADDRESS] | {{address_client}} |
[PURPOSE OF DISCUSSIONS] | {{textarea_purpose}} |
[NUMBER] | {{number_term_years}} |
[CLIENT EMAIL] | {{email_client}} |
[SIGNER NAME] | {{name_signer}} |
The first part of the name sets the kind of question. date_ gives a
date picker, address_ gives street, city, state, and zip code boxes,
name_ gives first and last name boxes, and email_ checks for a valid
email address. The rest of the name becomes the question's label, so
text_client_company is asked as Client Company. See
Placeholder Prefixes for every type,
including dropdowns and checkboxes.
You can type the placeholders into the Word document before you open it, using Word's own Find and Replace. Formaliq picks them up the same way.
As you edit, each placeholder appears under Used Fields on the left. That's how you know Formaliq has picked it up:
When every blank has a placeholder, click Save Template.
Step 4: Create the form
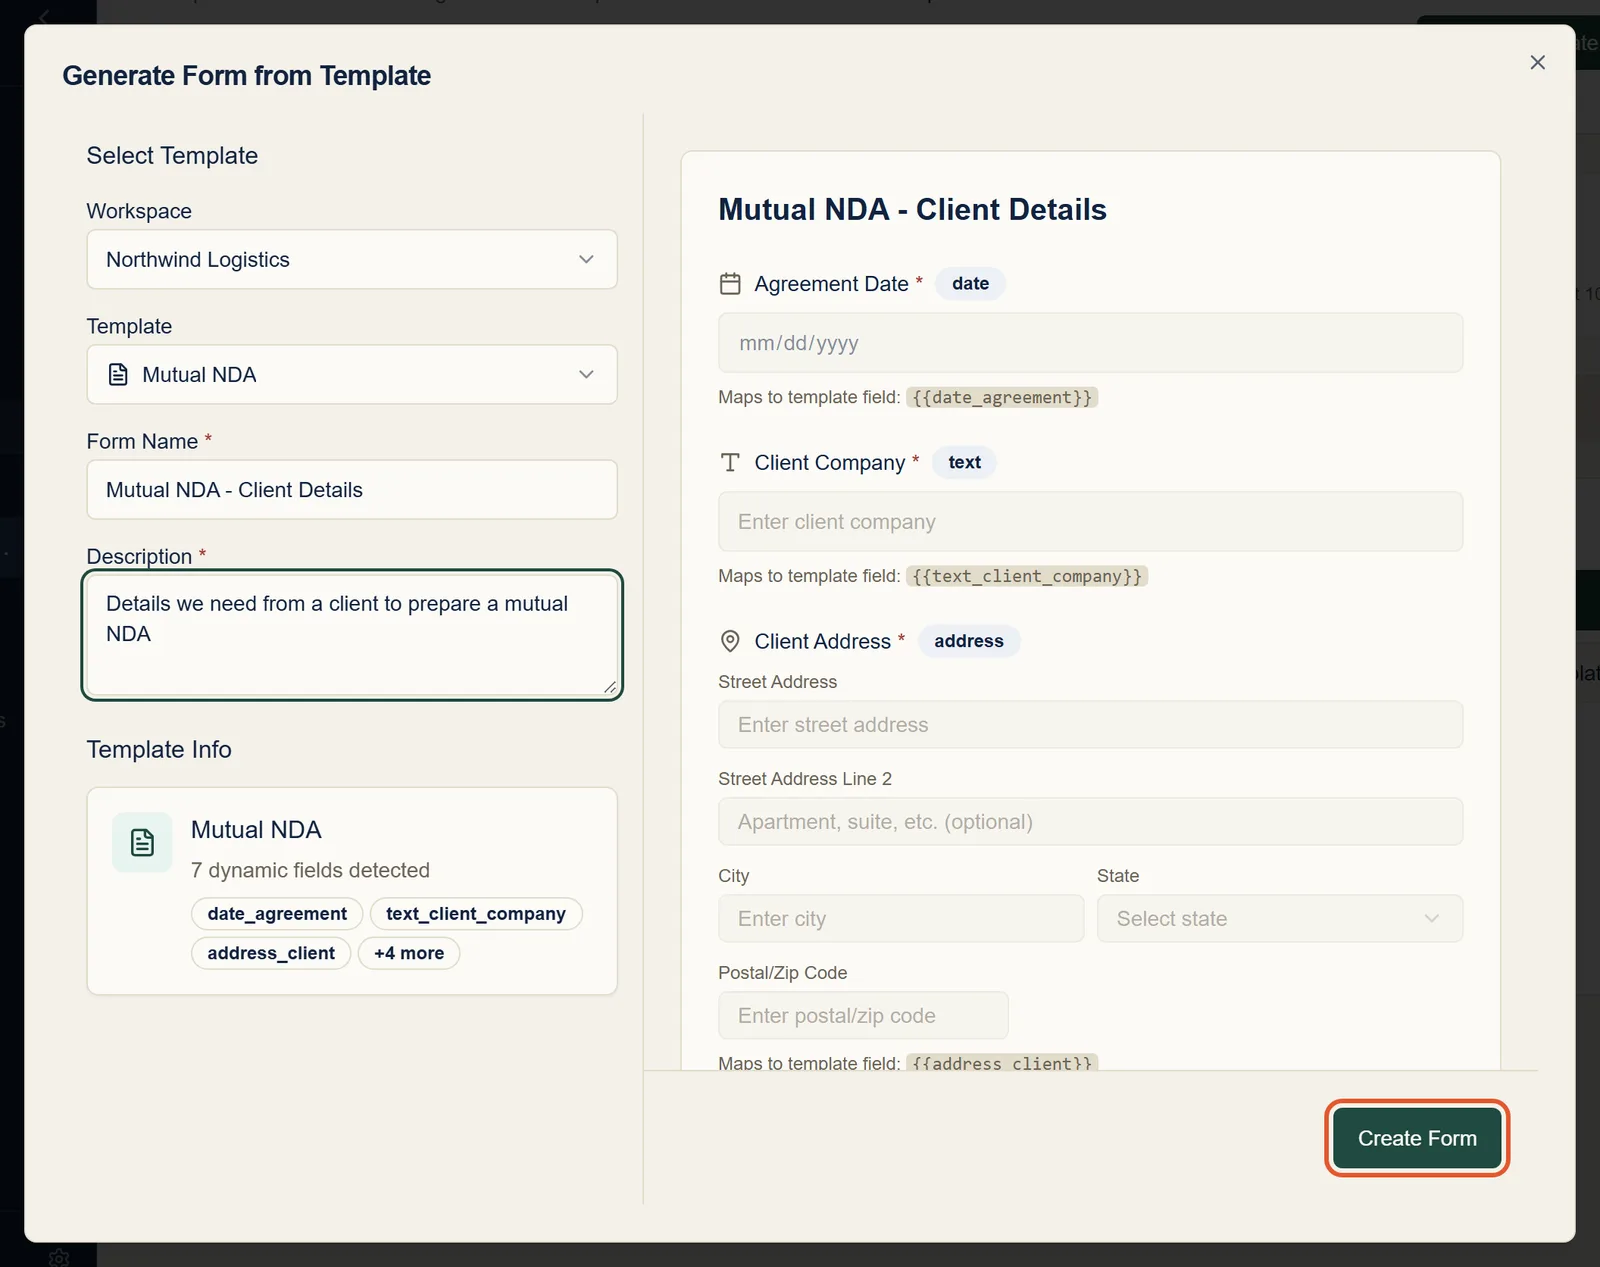
On the template's page, click Create Form from Template. Formaliq builds one question per placeholder and previews them on the right. Give the form a name the person filling it out will see, add a description, and click Create Form.
Step 5: Adjust the questions
The form opens in the form editor. Click any question to change it in the Edit Field panel on the right: reword the label, add Help Text with an example answer, or untick Required field to make it optional.
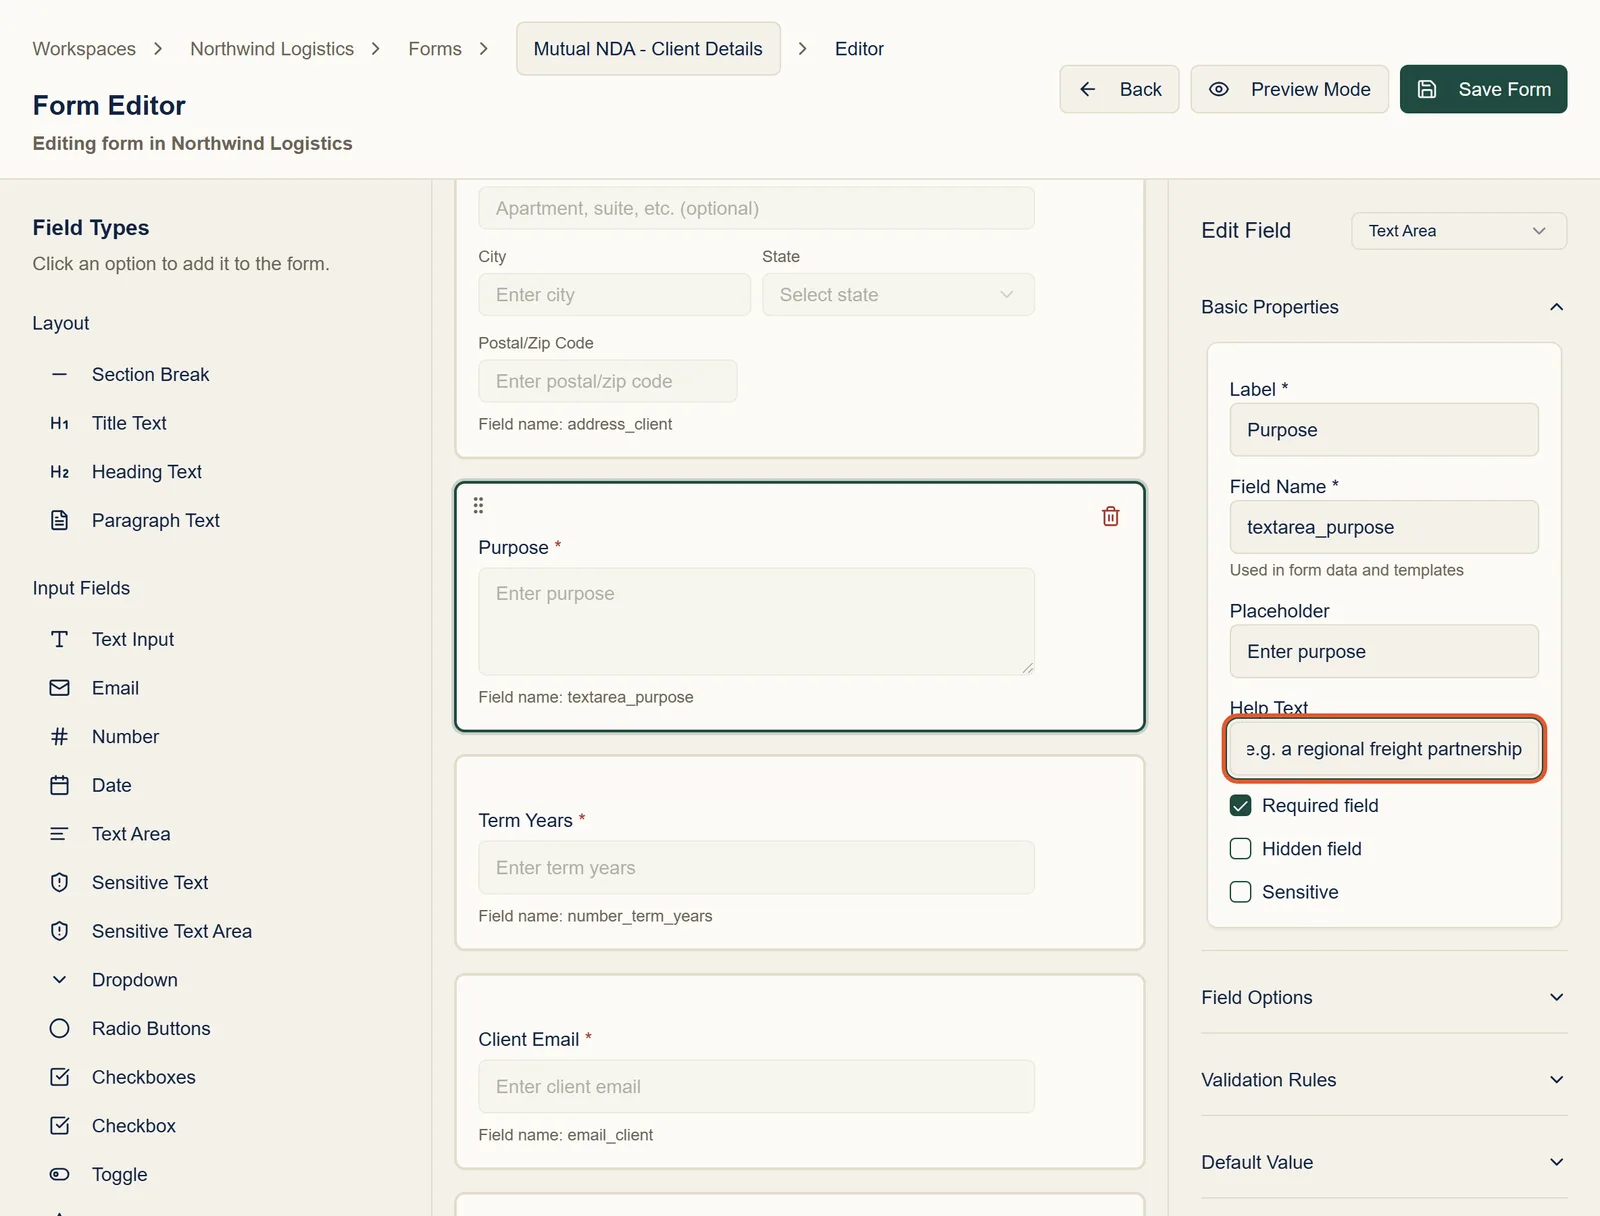
You can also drag questions into a different order, or add questions that aren't in the document, such as a section heading. See Forms for everything a question can do.
Step 6: Preview it
Click Preview Mode to see the form the way the person filling it out will, including your help text. Click Edit Mode to go back.
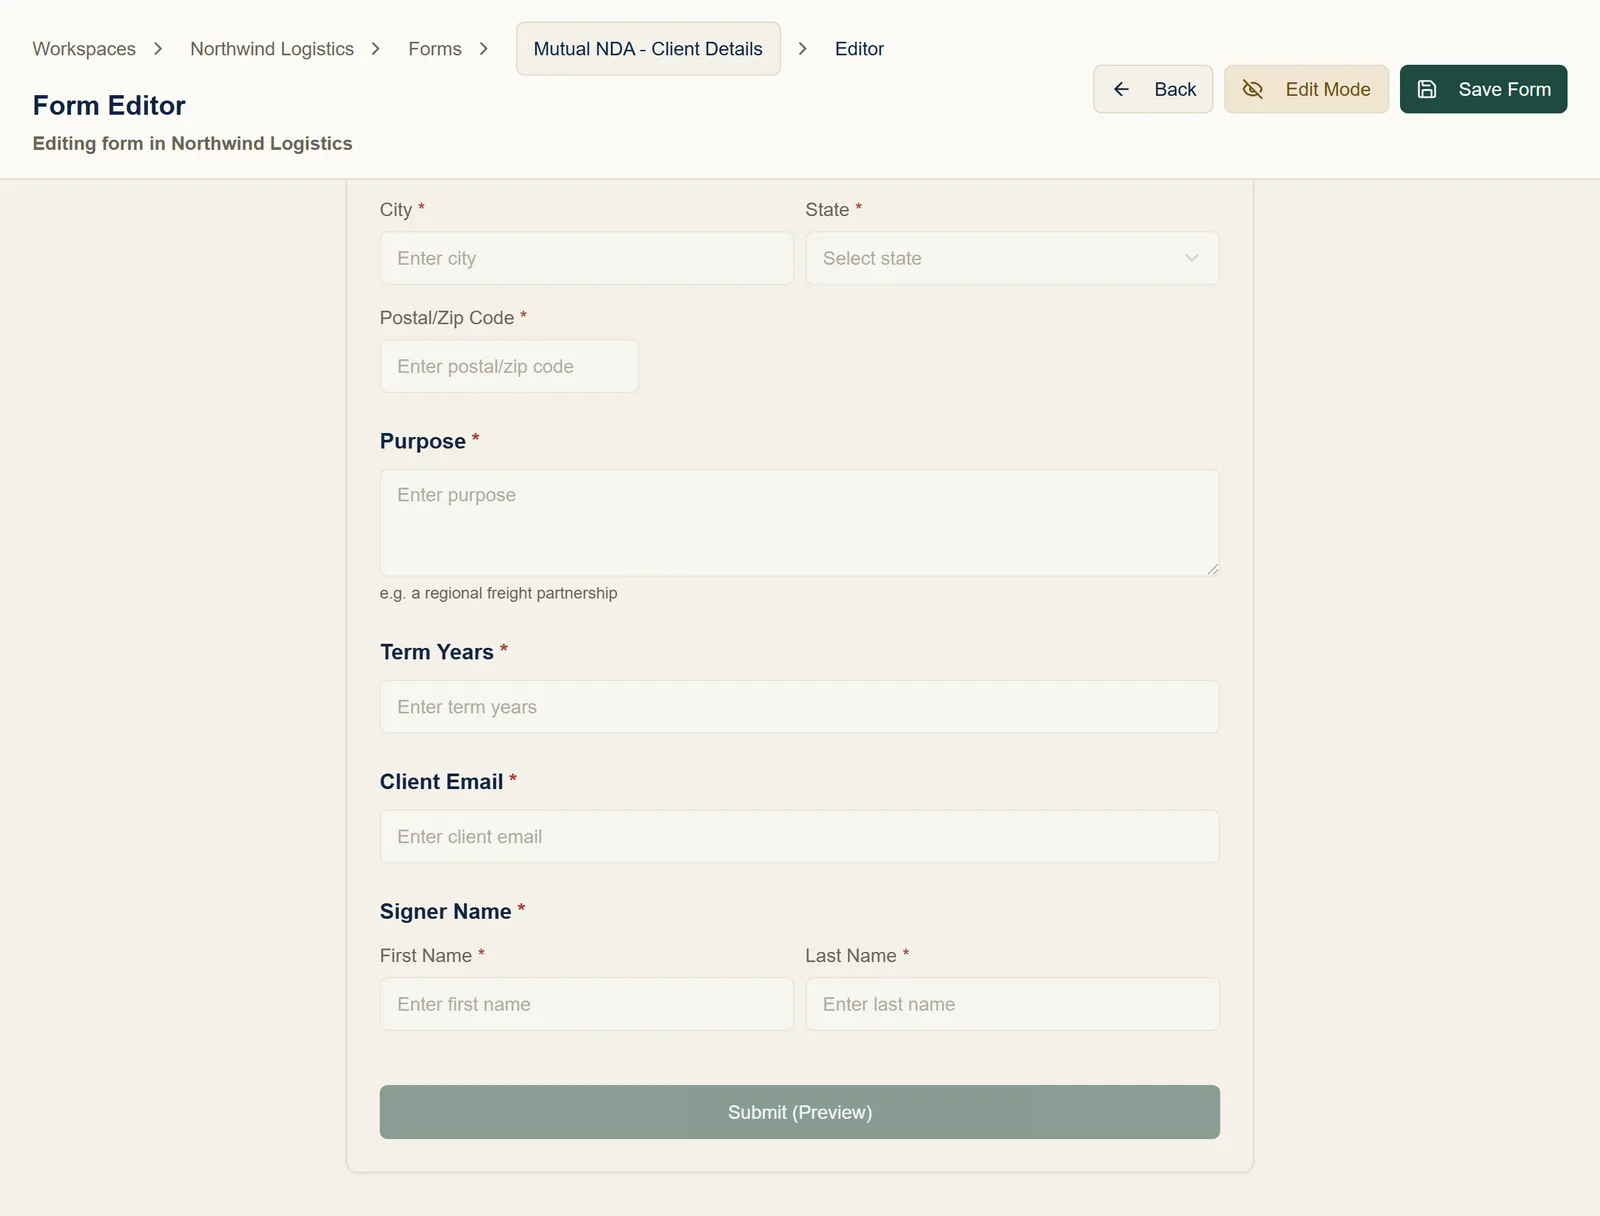
When it looks right, click Save Form.
Step 7: Share it as a link
On the form's page, click Send Invitations, choose Open Invitation, and click Create Link. Click Copy and paste the link anywhere: an email, a text message, your website, or a client portal.
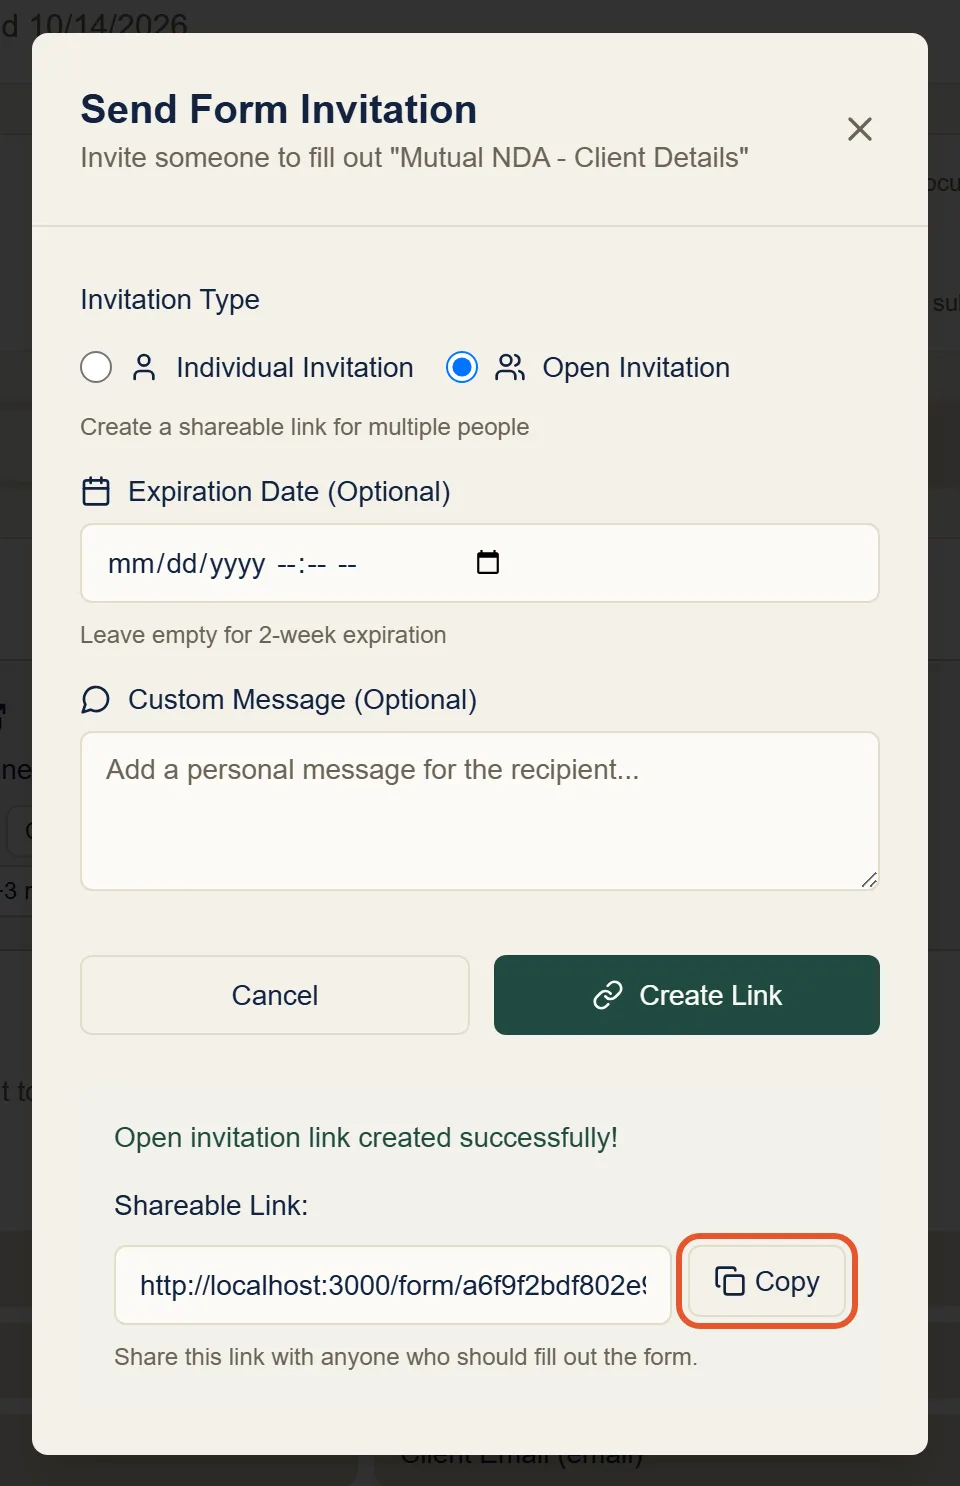
Anyone with the link can fill out the form, with no account needed. The link expires after two weeks unless you set a different Expiration Date.
If you'd rather email the form to one person and see whether they've opened it, choose Individual Invitation instead. See Send a form to a client and track the response.
Troubleshooting and FAQ
Can I upload a PDF instead of a Word document?
Not directly. Open the PDF in Word (Word can convert most PDFs), save it
as a .docx file, and open that in Formaliq.
A placeholder isn't showing under Used Fields
Check that it has two curly braces on each side and no spaces inside,
such as {{date_agreement}}. If you just opened a document that already
had placeholders in it, click into the document and type any character,
then delete it; the list refreshes when the document is edited.
A question came out as the wrong type
For example, a text box where you wanted a date picker. The prefix decides
the type. Rename the placeholder in the template (for
example {{agreement_date}} to {{date_agreement}}), save, and create the
form again. Or change the type in the form editor, using the dropdown at
the top of the Edit Field panel.
Can the same detail appear in several places in the document?
Yes. Use the same placeholder in each place. The question is asked once, and the answer fills every spot.
Do the people filling out the form need a Formaliq account?
No. They only need the link.
Next steps
- Generate documents from form submissions: turn each response into a completed copy of your Word document.
- Send a form to a client and track the response: email the form to someone and see when they open and submit it.
- Forms: every question type, validation rules, and questions that show only when they apply.